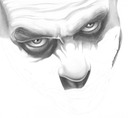
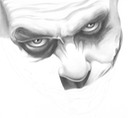
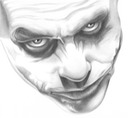
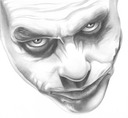
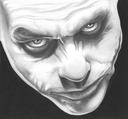
A step-by-step progression of the "Joker."
Materials List:
-Ruler
-Micron 03 Pen
-Magic Rub Eraser
-Kneaded Eraser
-Staedtler Clic Eraser
-Faber-Castell Eraser Pencil
-Mechanical Pencil, HB Lead, .05 mm
-02 mm Clutch Pencil, also known as a “Lead Holder,” HB Lead
-General’s Charcoal Pencil, 6B Extra Soft
-Circle Template (for irises, pupils, and highlights)
-Tortillion, also known as a Blender, or Paper Stump
-Scratch Paper
-Music: the soundtrack from “The Dark Knight,” to keep me in the mood. Thanks Mikenzee.
*Also a special ”Thanks,” to Devyn Vigil for suggesting the project. I would not have come up with it on my own...
GENERAL INSTRUCTIONS
I. Grid Drawing:
A. Complete the grid drawing one square at a time. Make no mistakes. Focus on accuracy. Even errors of millimeters can change the likeness of your subject.
B. Do not darken your lines. Keep them light which will make transferring your image much easier. However, if you’re planning to trace the image to your final surface, having dark lines will actually make it easier to see and trace.
C. Use a “Circle Template” for the pupils, irises, and eye highlights. It looks very unprofessional to have circles that are lopsided.
II. Transferring the Image
A. Transfer or trace the line drawing lightly to the final surface. Use the carbon transfer method by scribbling on the back, or use a light box, or window to trace the image. Your objective should be to have an image that can just barely be seen on your final surface.
Advice: Don’t press hard. Pressing hard creates lines that are too dark on the final surface, or worse, deep grooves on the final surface.
III. General Shading Tips:
A. Use all nine values (0% - 100%). Your drawing should not be all “gray,” but should have a variety of values.
B.
Eliminate all lines. All edges and forms should be defined by value,
not lines. Lines are artificial and create a “cartoon” effect, which is
exactly what you don’t want.
C. No two shapes, next to each other, may be the same value -- there must be contrast (differences in value) between them.
D. Use scratch paper. Always rest your drawing hand on a piece of scratch paper, never on top of your drawing.
E. Work on small areas at a time.
F. Sharpen pencil often.
G. Take frequent breaks.
H. Don’t get frustrated.
IV. Resources:
A. Books:
“How to Draw Lifelike Portraits from Photographs,” by Lee Hammond. Readily available at Barnes & Noble, or at amazon.com.
“Drawing Realistic Textures in Pencil,” by J.D. Hillberry. It’s a wonderful book available on J.D. Hillberry’s web site or at amazon.com.
“Drawing from Line to Life,” by Mike Sibley. It’s the best and most comprehensive book on pencil shading that I have ever seen. It’s a self-published book and it’s expensive, and not available from American book sellers (he’s English and it ships from the UK). You have to buy it from Mike Sibley’s web site. I have this book and it’s not really a book for beginners, it would be better to learn the material in Lee Hammond’s book first.
B. Internet:
J.D. Hillberry’s Mini Pencil Drawing Tutorial. Here Mr. Hillberry shows you a step-by-step of a pencil “trompe l'oeil” (to deceive the eye) drawing of a rose.
Mike Sibley’s Studio Tips. Great resource for drawing tips, tools and materials, drawing hair, etc.
The Artwork of Aurelia. Aurelia is a French artist who specializes in celebrity pencil portraits. Be sure to check out her "Tutorials," and her "Work in Progress." She will inspire you.
The Artwork of Linda Huber. Linda Huber specializes in pencil. Be sure to check her "Drawing Tips." Also, check her "Drawing Tutorials." She’s a magician with a pencil.
The Artwork of Pat McMichael. Pat McMichael specializes in celebrity pencil portraits. Click on the images to enlarge them, and click on the "QuickTime" logo (Q) to see animations of stages of his work in progress.
Gary Saderup specializes in celebrity portraits using charcoal. A Google Search for “Gary Saderup” will bring up many of his images.


